
Asphalt Shingle Roof Installation Made Easy
Learn how to simplify asphalt shingle roof installation with this expert guide. Discover step-by-step roofing installation tips, tools, and FAQs to protect your home effectively.
Roofing installation is one of the most crucial stages in building or renovating a home. When done properly, it safeguards the property from weather damage, improves energy efficiency, and enhances curb appeal. Among all roofing options, asphalt shingles remain the most popular for their affordability, durability, and ease of installation.
For homeowners and property managers in Johns Creek, GA, understanding the basics of roofing installation is essential to maintaining a safe and durable roof. With the area's seasonal weather changes—hot summers and occasional heavy rains—proper roofing installation, especially for asphalt shingles, can help protect your home from damage and improve energy efficiency. Whether you’re considering a DIY project or planning to hire professionals, having a clear step-by-step guide is invaluable. For those wanting more detailed information, there are useful guides available covering everything about asphalt shingle roofs that can help you make informed decisions.
What Is Roofing Installation?
Roofing installation refers to the process of placing roofing materials over a home or building structure to protect it from the elements. It includes several phases, from preparation and underlayment to laying shingles and finishing touches. For asphalt shingle roofs, the process is relatively simple compared to tile or metal roofing, making it a go-to option for residential properties.
Why Choose Asphalt Shingles for Roofing Installation?
There are several reasons why homeowners and contractors prefer asphalt shingles:
- Affordability: Asphalt shingles are budget-friendly while offering solid protection.
- Variety: Available in various colors and styles to suit different home designs.
- Ease of Installation: Lighter and simpler to install than many alternatives.
- Durability: Typically lasts 15–30 years with proper care.
- Repairability: Individual shingles can be replaced easily if damaged.
Tools & Materials You’ll Need
Before beginning your roofing installation, gather the following:
- Asphalt shingles
- Roofing nails and nail gun
- Roofing underlayment (felt or synthetic)
- Drip edge
- Roofing cement
- Utility knife
- Measuring tape and chalk line
- Ladder and safety gear
- Hammer
- Pry bar (for removing old shingles)
Step-by-Step Roofing Installation Guide for Asphalt Shingles
1. Remove the Old Roofing
If you’re replacing an old roof, the first step is to strip away existing materials. Use a pry bar and roofing shovel to remove shingles, nails, and underlayment. Inspect the roof deck for any signs of rot or water damage.
2. Inspect and Prepare the Decking
Check the plywood or OSB sheathing underneath. Replace any damaged or weak sections. A solid, flat surface ensures a smooth installation.
3. Install the Drip Edge
Start at the eaves and install metal drip edge flashing. This prevents water from curling under the roofing and causing damage.
4. Roll Out the Underlayment
Lay down roofing underlayment to create a moisture barrier. Overlap each row by at least 2 inches and staple or nail it securely. Underlayment adds extra protection beneath the shingles.
5. Apply Starter Strip Shingles
Begin at the lower edge of the roof. Starter strips provide a solid base and prevent wind uplift on the first course of shingles.
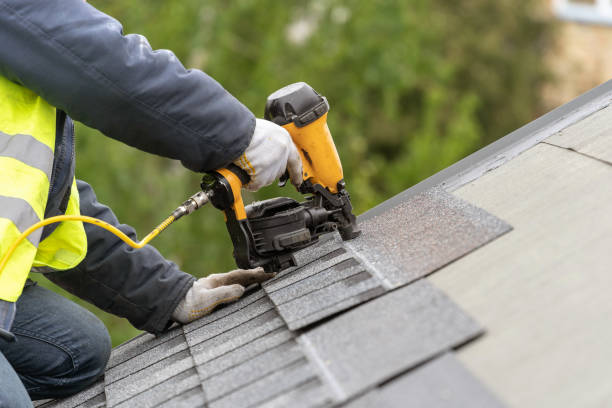
6. Install Asphalt Shingles
Start with the first row directly above the starter strip. Use a chalk line to ensure straight alignment. Nail shingles about 6 inches up from the bottom and 1 inch from each edge. Overlap each successive row by half a tab.
7. Flashing and Ventilation
Install metal flashing around chimneys, skylights, and vents to prevent water intrusion. Ensure that attic vents are not obstructed to allow proper airflow.
8. Cap the Ridge
Use ridge cap shingles to finish the peak of the roof. Nail them in place and seal exposed nails with roofing cement.
9. Final Inspection and Cleanup
Walk the roof to check for missed nails or unsecured shingles. Clean debris, check for alignment, and ensure flashing is properly installed.
Tips for DIY Roofing Installation
- Safety First: Always wear proper footwear, use harnesses, and work with a partner.
- Weather Watch: Install on clear, dry days for best results.
- Use Quality Materials: Cheap shingles may save money upfront but can fail faster.
- Take Your Time: Rushing can lead to mistakes and leaks down the line.
If you’re unsure about any part of the process, it's wise to consult with professionals. Mistakes in roofing installation can lead to expensive repairs later on.
Maintenance After Installation
To maximize the life of your asphalt shingle roof:
- Inspect it twice a year
- Clean gutters and downspouts regularly
- Remove moss or algae buildup
- Replace damaged shingles promptly
- Schedule professional inspections every few years
Conclusion
Roofing installation using asphalt shingles is a project that offers high returns when done correctly. Whether you're a DIY enthusiast or plan to hire a contractor, understanding the process helps you make informed decisions and avoid common pitfalls. With the right tools, safety precautions, and attention to detail, even beginners can manage small-scale repairs or oversee full installations confidently.
FAQs
Q1: How long does asphalt shingle roofing installation take? A: For an average-sized home, installation typically takes 1–3 days, depending on weather and complexity.
Q2: Can I install asphalt shingles over old ones? A: While it's possible, it’s not recommended. A clean deck allows for a more secure and longer-lasting roof.
Q3: What are the signs that shingles were not installed properly? A: Signs include curling edges, uneven rows, loose shingles, and exposed nail heads.
Q4: How do I choose between 3-tab and architectural shingles? A: 3-tab shingles are more affordable and lighter. Architectural shingles are thicker, more durable, and offer better curb appeal.
Q5: Is a permit needed for roofing installation? A: In many areas, yes. Always check with your local building department before starting